How to Add a Sticky Add-to-Cart Feature in Your Shopify Store

In this ever-changing fast-paced world of e-commerce where the increase of competitors gives buyers an advantage of choice over different brands, it becomes seamlessly important to grab and retain their attention towards what we offer. This is where the importance of an eye-catching UI plays a vital role. A “Sticky Add to Cart” feature becomes one such tool of your arsenal that might help you not only to enhance UI but also to boost up the conversion rate.
With this comprehensive guide, we'll explore what a sticky add-to-cart feature is, why is it vital for your Shopify store, and provide a step-by-step guide so that you can implement it manually on your store.
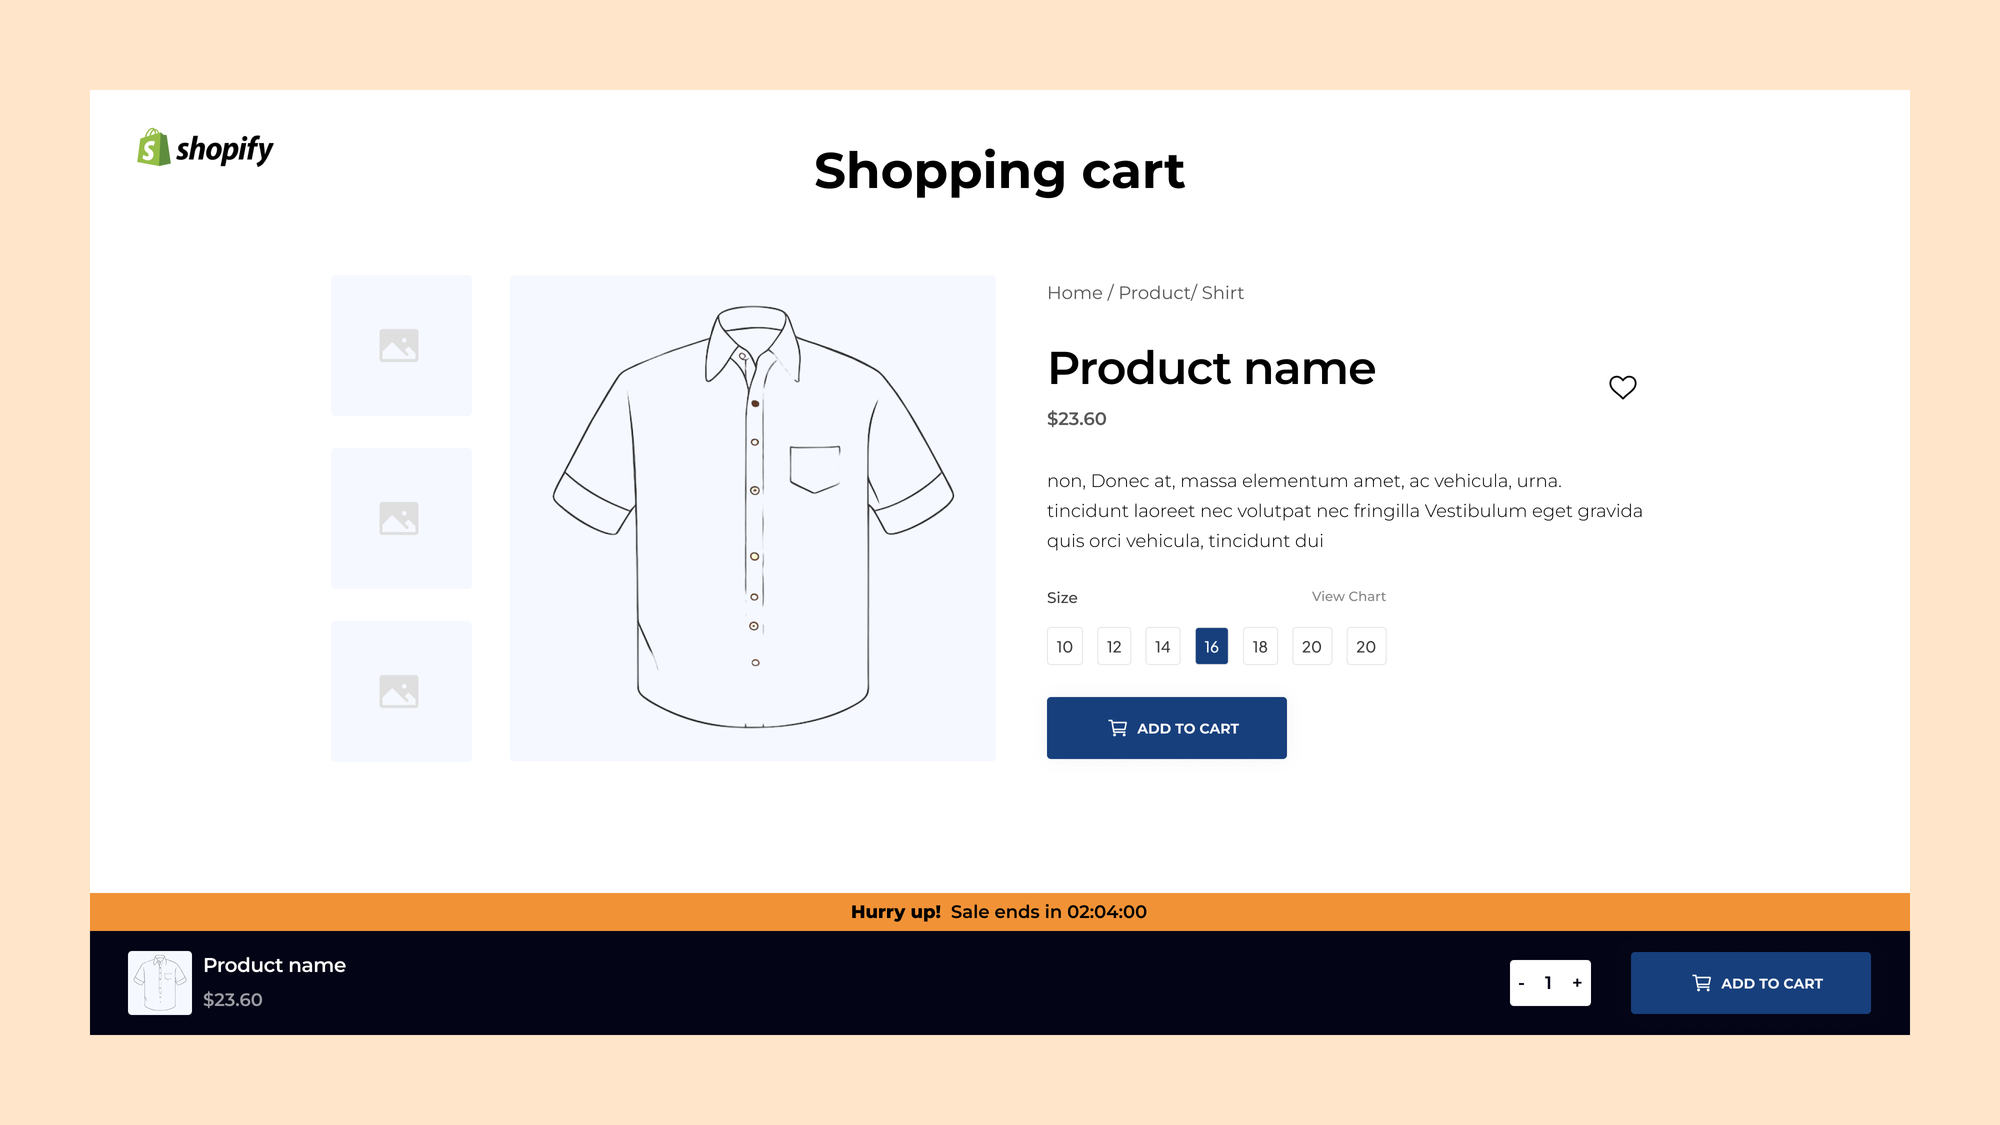
Understanding the "Sticky Add to Cart" Feature
From a buyer’s perspective, whenever I visit any site to purchase some products. Rather than scrolling here and there I want my experience to be efficient and convenient, a sticky add to cart ensures that the “Add to Cart” button is visible and accessible as the buyer scrolls through the product page hence eliminating the wearisome need of scrolling back to add the item to the shopping cart. This Sticky cart improves the experience and overall chances of conversion from a user.
Importance of a Sticky Add-to-Cart Feature
Enhanced User Experience: Keeping the add-to-cart button readily available makes it simple for the buyers to add that product to their cart, leading to higher customer satisfaction.
Increased Conversions: Buyers are more likely to add items to their carts impulsively as long as the option of “Adding Item to Cart” is available right on their screens, this results in higher conversion rates which ultimately improves sales.
Mobile Optimization: When it comes to smaller screens, sticky add to cart ensures it sticks right bottom of their phone screen and is accessible at any point in time.
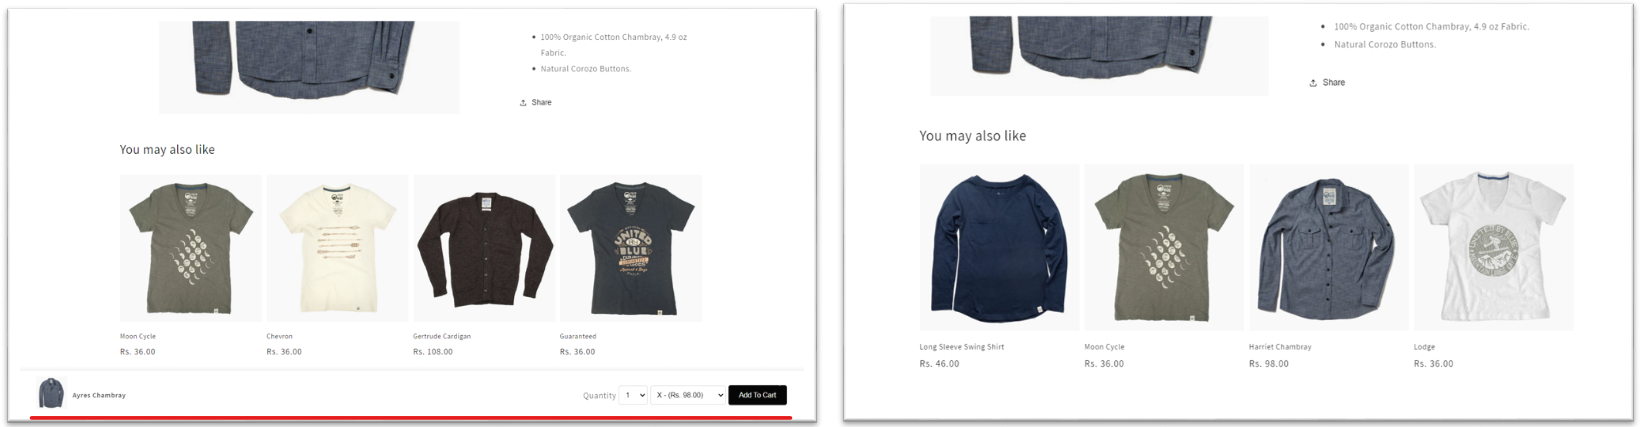
Below are before and after screenshots showcasing the improved accessibility and user-friendliness:
Steps to Implement a Sticky Add-to-Cart Feature Manually
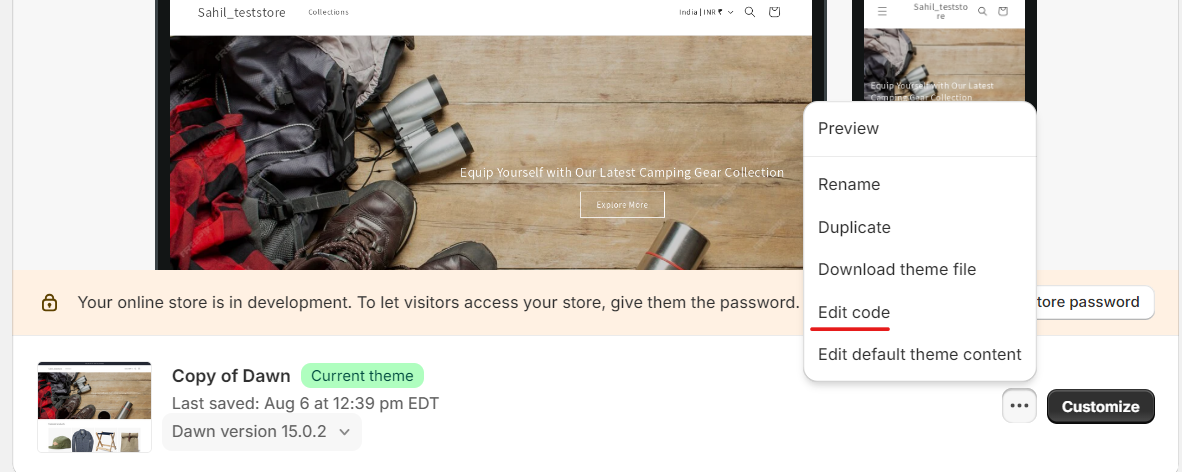
Step 1: Navigate to Shopify Theme Files
Log in to your Shopify admin dashboard and navigate to "Online Store" > "Themes."
Click on the "Actions" menu next to your active theme and select "Edit code."
Step 2: Create a 'sticky-add-to-cart' snippet
Create a snippet with the name "sticky-add-to-cart" and paste the following code inside the snippet
{% style %}
.sticky-cart-bar {
  display: none;
  gap: 1rem;
  justify-content: space-between;
  align-items: center;
  background: #fff;
  position: fixed;
  bottom: 0;
  left: 0;
  width: 100%;
  padding: 10px 50px;
  box-shadow: 0 -2px 10px rgba(0, 0, 0, 0.1);
  z-index: 100;
}

.sticky-cart-product-info {
  display: flex;
  align-items: center;
}

.sticky-cart-product-image {
  margin-right: 10px;
}

.sticky-cart-product-image img {
  width: 60px;
  height: 60px;
  object-fit: cover;
}

.sticky-cart-product-title {
  font-size: 1.3rem;
  font-weight: bold;
}

.sticky-cart-form {
  display: flex;
  align-items: center;
}

.sticky-cart-form-controls{
  display: flex;
  align-items: center;
}

.sticky-cart-quantity-label {
  margin-right: 5px;
}

.sticky-cart-quantity-wrapper {
  position: relative;
  margin-right: 5px;
}

.sticky-cart-quantity-select {
  padding: 8px;
  border: 1px solid #ccc;
  border-radius: 4px;
  cursor: pointer;
}

.sticky-cart-variant-select {
  margin-right: 5px;
  padding: 8px;
  border: 1px solid #ccc;
  border-radius: 4px;
}

.sticky-cart-add-button {
  background-color: black;
  color: white;
  padding: 10px 20px;
  border: none;
  border-radius: 4px;
  cursor: pointer;
}

@media (max-width: 768px) {
  .sticky-cart-bar {
    padding: 10px;
  }

  .sticky-cart-product-title {
    font-size: 1rem;
  }

  .sticky-cart-quantity-label {
    display: none;
  }

  .sticky-cart-add-button {
    padding: 8px 15px;
  }
}

@media (max-width: 480px) {
  .sticky-cart-product-title {
    max-width: 120px;
    overflow: hidden;
    text-overflow: ellipsis;
    white-space: nowrap;
  }

  .sticky-cart-quantity-select,
  .sticky-cart-variant-select,
  .sticky-cart-add-button {
    font-size: 0.9rem;
  }
}

@media (max-width: 390px) {
  .sticky-cart-quantity-select{
     display: none;
  }
}

{% endstyle %}

<div class="sticky-cart-container" {% unless section.settings.enable_sticky_bar %}style="display:none;"{% endunless %}>
  {% form 'product', product, id: 'stickyAddToCartForm', class: 'sticky-cart-form' %}
    <div class="sticky-cart-bar">
      <div class="sticky-cart-product-info">
        <div class="sticky-cart-product-image">
          <img src="{{ product.featured_media | image_url: width: 60 }}" alt="{{ product.title }}">
        </div>
        <div class="sticky-cart-product-title">
          {{ product.title }}
        </div>
      </div>
      <div class="sticky-cart-form-controls">
        <label for="stickyCartQuantity-{{ section.id }}" class="sticky-cart-quantity-label">Quantity</label>
        <div class="sticky-cart-quantity-wrapper">
          <select id="stickyCartQuantity-{{ section.id }}" name="quantity" class="sticky-cart-quantity-select" data-quantity-input>
            {% for i in (1..10) %}
              <option value="{{ i }}">{{ i }}</option>
            {% endfor %}
          </select>
        </div>
        {% unless product.has_only_default_variant %}
          <select name="id" class="sticky-cart-variant-select">
            {% for variant in product.variants %}
              <option value="{{ variant.id }}" {% if variant.available == false %}disabled{% endif %}>
                {{ variant.title }} - ({{ variant.price | money_with_currency }})
              </option>
            {% endfor %}
          </select>
        {% endunless %}
        <button type="submit" class="sticky-cart-add-button">Add To Cart</button>
      </div>
    </div>
  {% endform %}
</div>

<script>
document.addEventListener('DOMContentLoaded', function() {
  const stickyCartBar = document.querySelector('.sticky-cart-bar');
  const productForm = document.querySelector('.product-form');

  if (stickyCartBar && productForm) {
    window.addEventListener('scroll', function() {
      const formRect = productForm.getBoundingClientRect();
      if (formRect.bottom < 0) {
        stickyCartBar.style.display = 'flex';
      } else {
        stickyCartBar.style.display = 'none';
      }
    });
  }
});
</script>
Step 3: Render the snippet in “main-product.liquid” Section
Paste the following code just where the section tag ends and before the start of the schema.
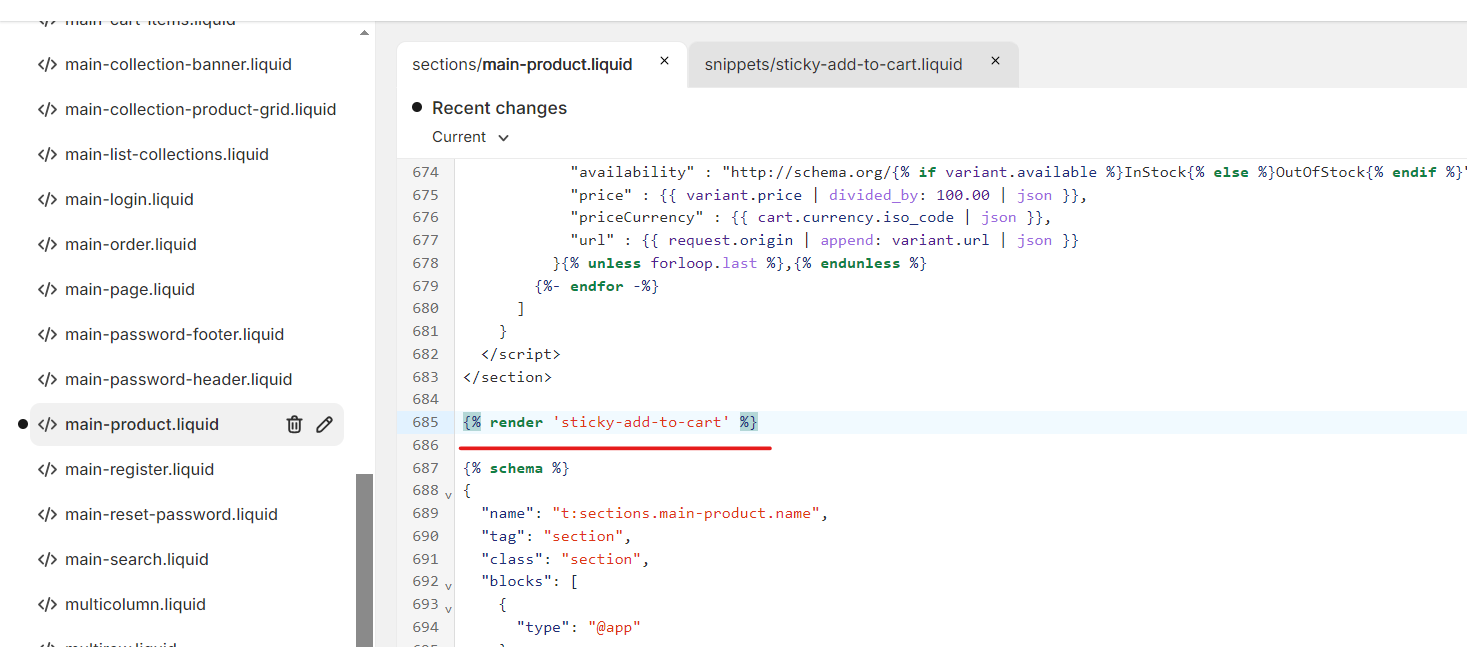
{% render 'sticky-add-to-cart' %}Step 4: Modify Schema of the “main-product.liquid” Section
Paste the code given below, into your schema "settings"
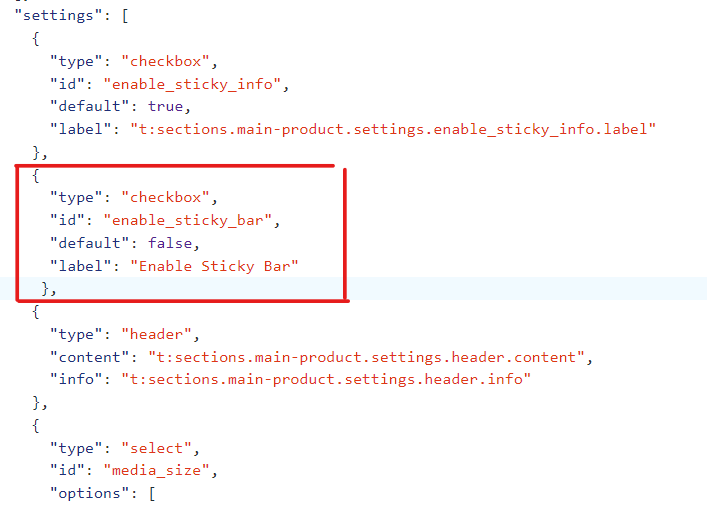
{
  "type": "checkbox",
  "id": "enable_sticky_bar",
  "default": true,
  "label": "Enable Sticky Bar"
 },
Step 5: Enable the Sticky Bar from Theme Customization
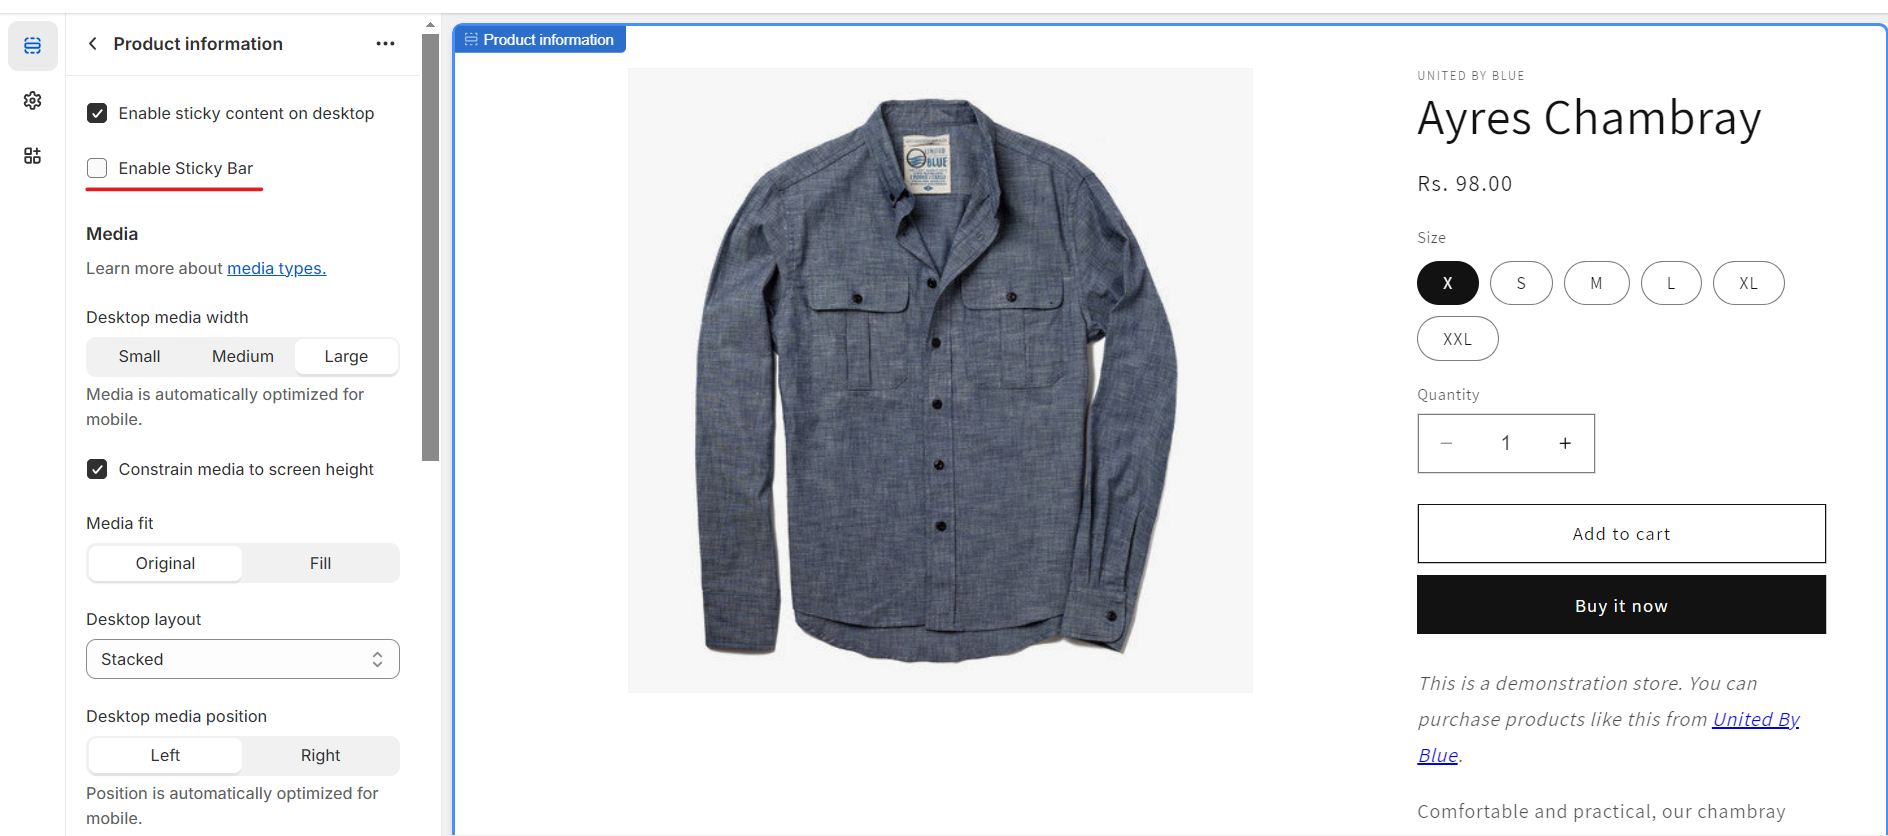
Select the “Enable Sticky Bar” option, and that’s it!!!
Conclusion
Adding a sticky add-to-cart feature becomes one such tool of your arsenal that might help you not only to enhance UI but also to boost the conversion rate. By following the step-by-step tutorial provided in this guide, you can integrate this Shopify sticky cart feature into your Shopify store and make the most of its benefits.